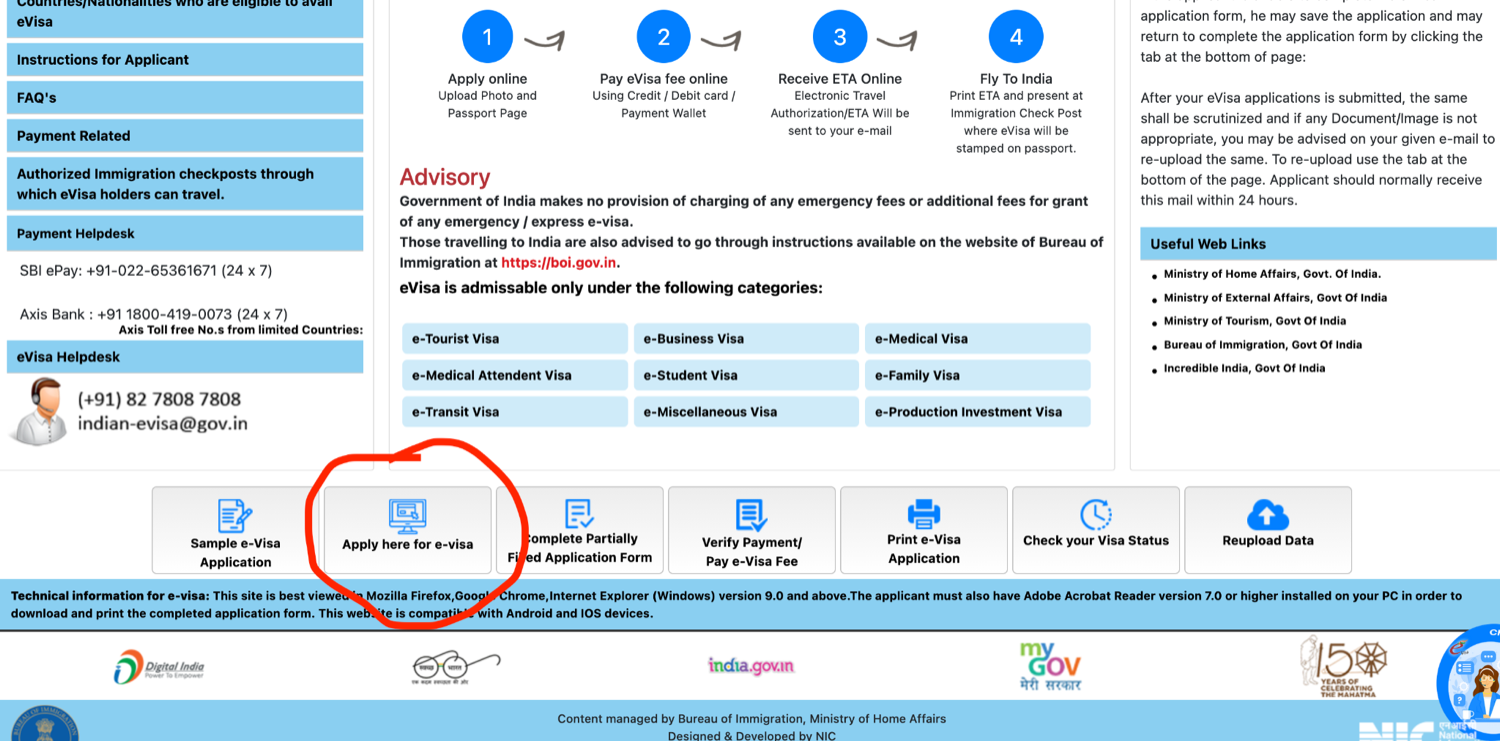
You need a tourist e-Visa to enter India. The application is done online, takes about an hour, and we recommend applying at least four weeks before you travel.
We recommend applying latest 4 weeks before traveling. A 30-day tourist e-Visa typically costs approximately €10–€40, depending on the season and exchange rate. (Longer-duration visas cost more.)
Please ensure your passport has at least two blank pages and is valid for at least six months beyond your arrival date in India.
Before you start
Please keep in mind, that the website is a bit bumpy. You will also have to enter information like your Passport ID, address etc multiple times. Plan in an hour for getting through the procedure.
We recommend using Google Chrome for the application — the website works most reliably there. Safari tends to be the least stable.
Make sure to take a screenshot of your application ID during and after completing the process! You will need it to log into the website, check your visa status, and download your visa after applying.
And throughout the whole form: no umlauts or special characters (ä, ö, ü, ß). The website can't handle them, so write ae, oe, ue, ss.
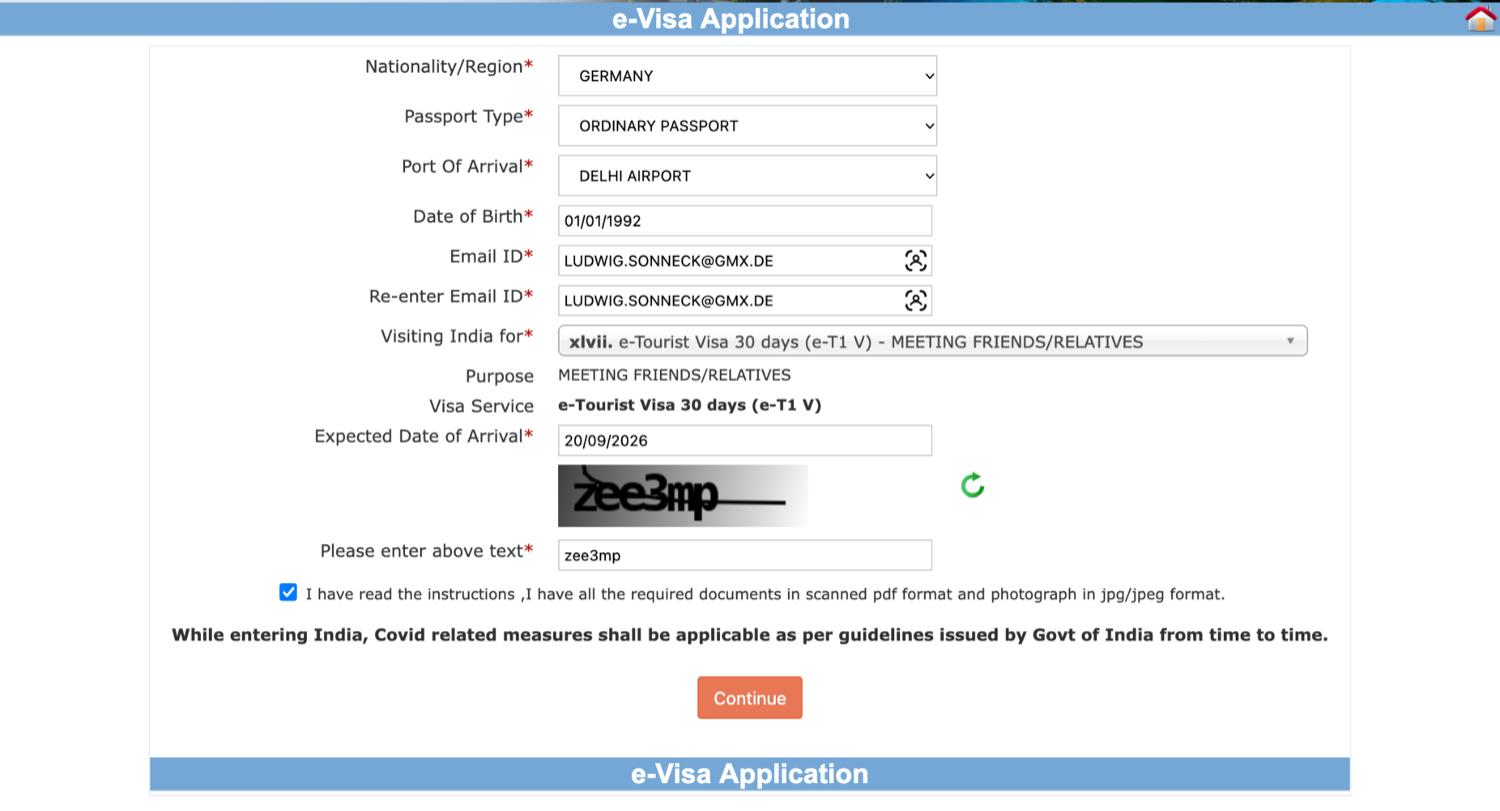
In the next screen, fill in the details to Passport, Port of Arrival (select DELHI AIRPORT), email, Passport Type (select ORDINARY PASSPORT), and Visiting India for (select the 30-day tourist e-Visa for meeting friends/relatives — the exact code in the dropdown may differ, e.g. xIvii. e-Tourist Visa 30 days (e-T1 V) - MEETING FRIENDS/RELATIVES — what matters is tourist visa, 30 days, meeting friends and relatives). Or, when you want to stay more than one month, choose a longer one. So it looks like this:
Then click "Continue", click "OK" when these popups ask for confirmation.
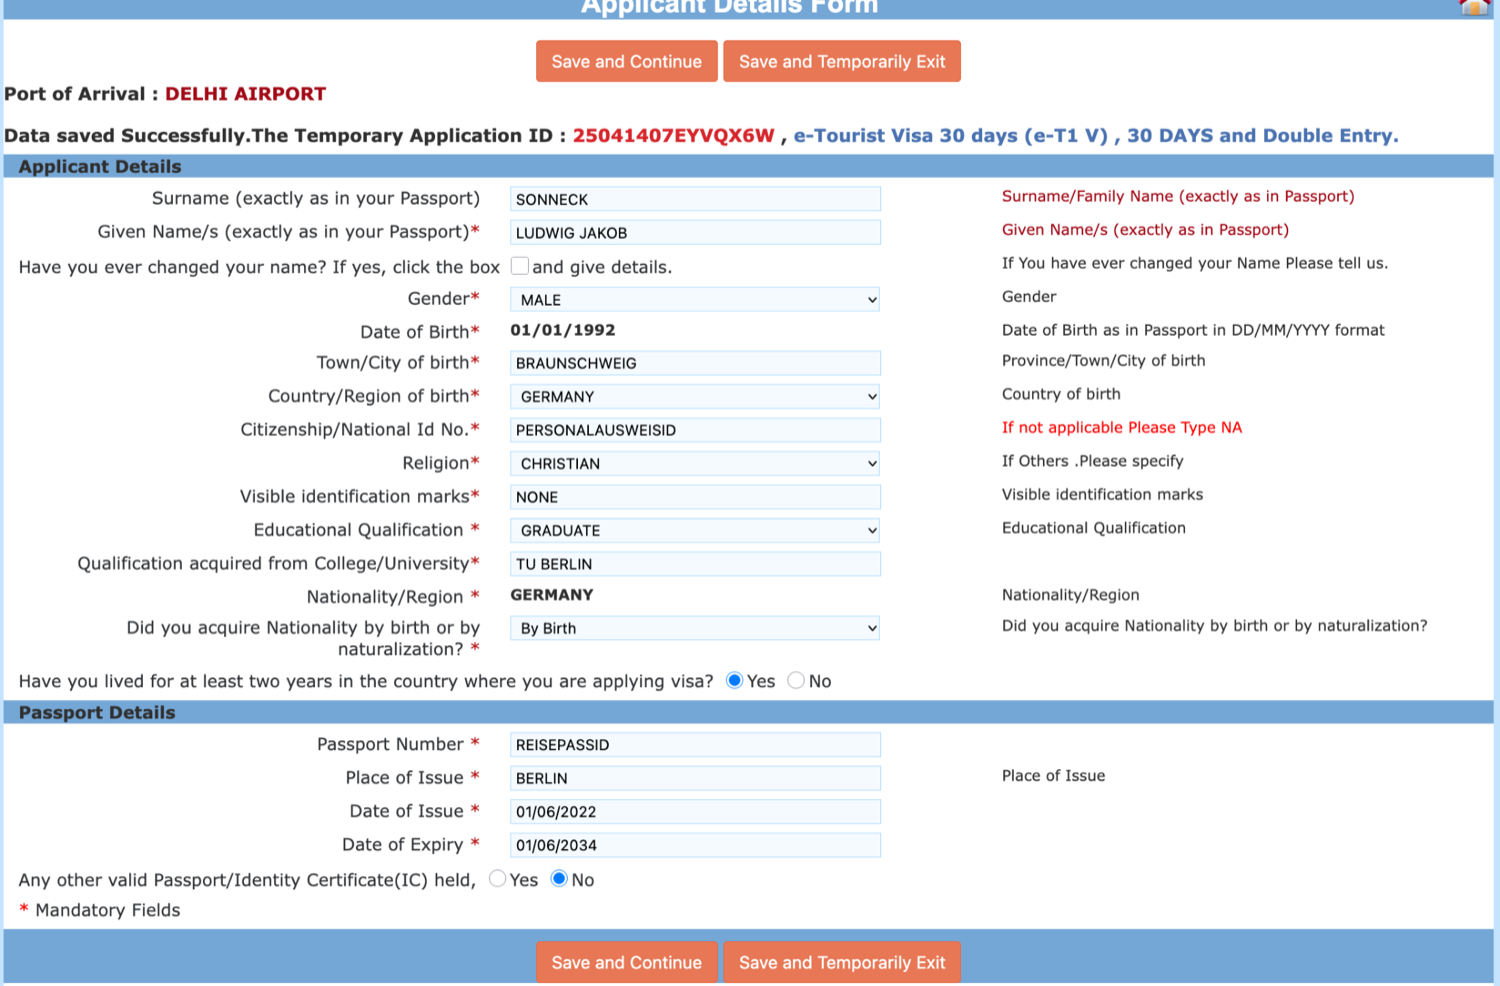
On the next page, fill in all the details here (Achtung: keine Umlaute, ä, ö, ü, und keine Sonderzeichen oder ß nutzen, damit kann die Website nicht umgehen).
"Religion": select CHRISTIAN
"Visible identification marks": Type in None or something like "Mole on left cheek" "Scar on right forearm" "Birthmark on neck"
"Have you lived for at least two years in the county where you are applying visa": select Yes
"Any other valid Passport … held": select No
"Citizenship/National Id No.": enter Personalausweis ID Nummer
See example below filled in:
Click "Save and Continue". If it's working, you'll get to the next page. If the website didn't like any entry, it will stay on the same screen but all inputs are empty again, and you have to fill those in again, to try again. (This could mean you used an incorrect symbol somewhere or didn't fill in a field – the red letters on the right will sometimes tell you what the mistakes were).
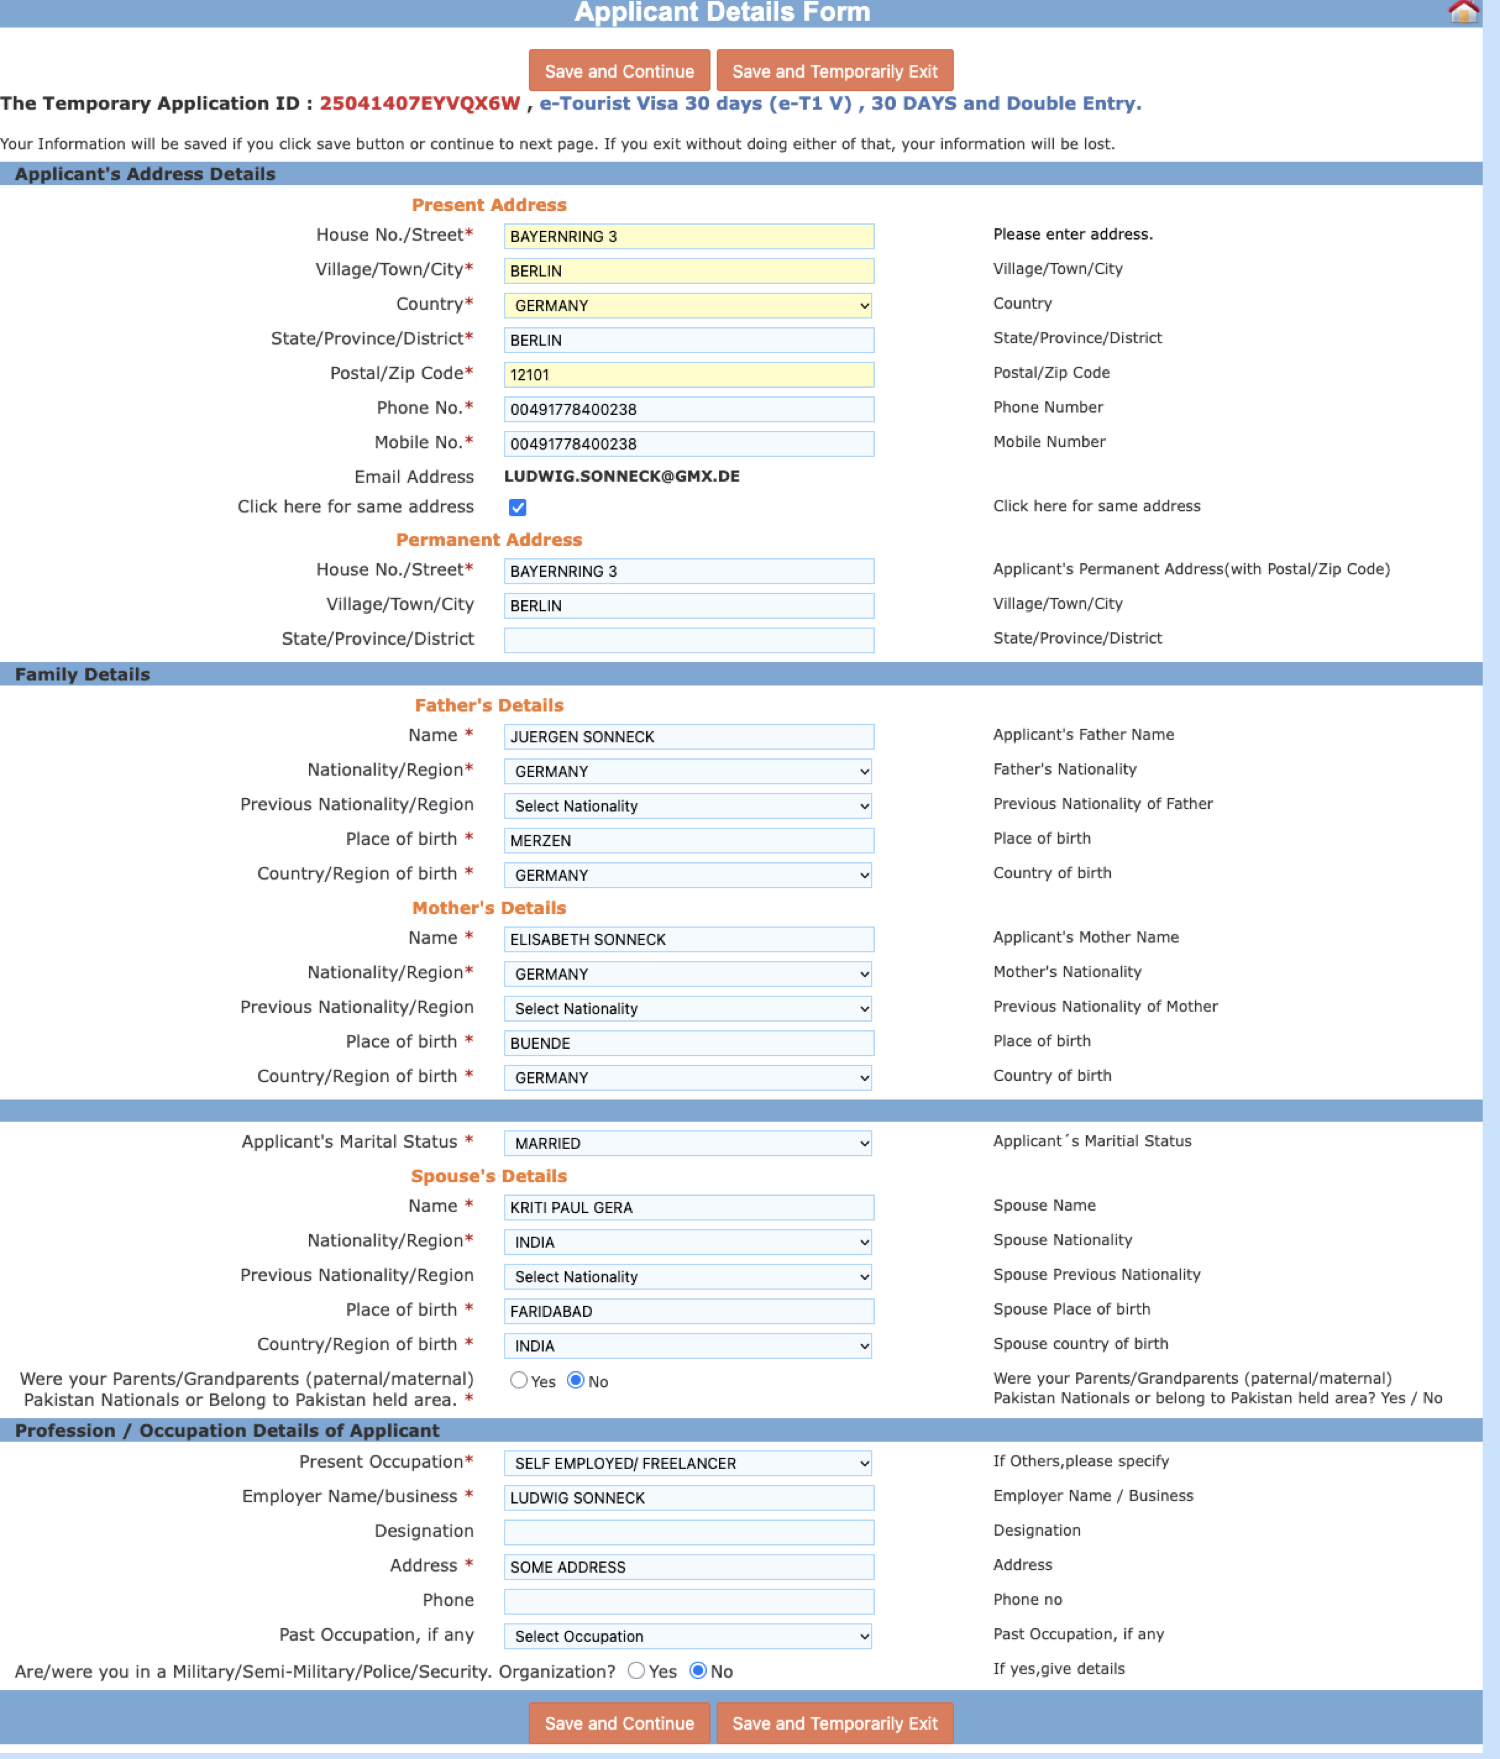
On the next page, fill in the details in this way (again, no Umlaute etc, be gentle to the website):
Click "Save and Continue"
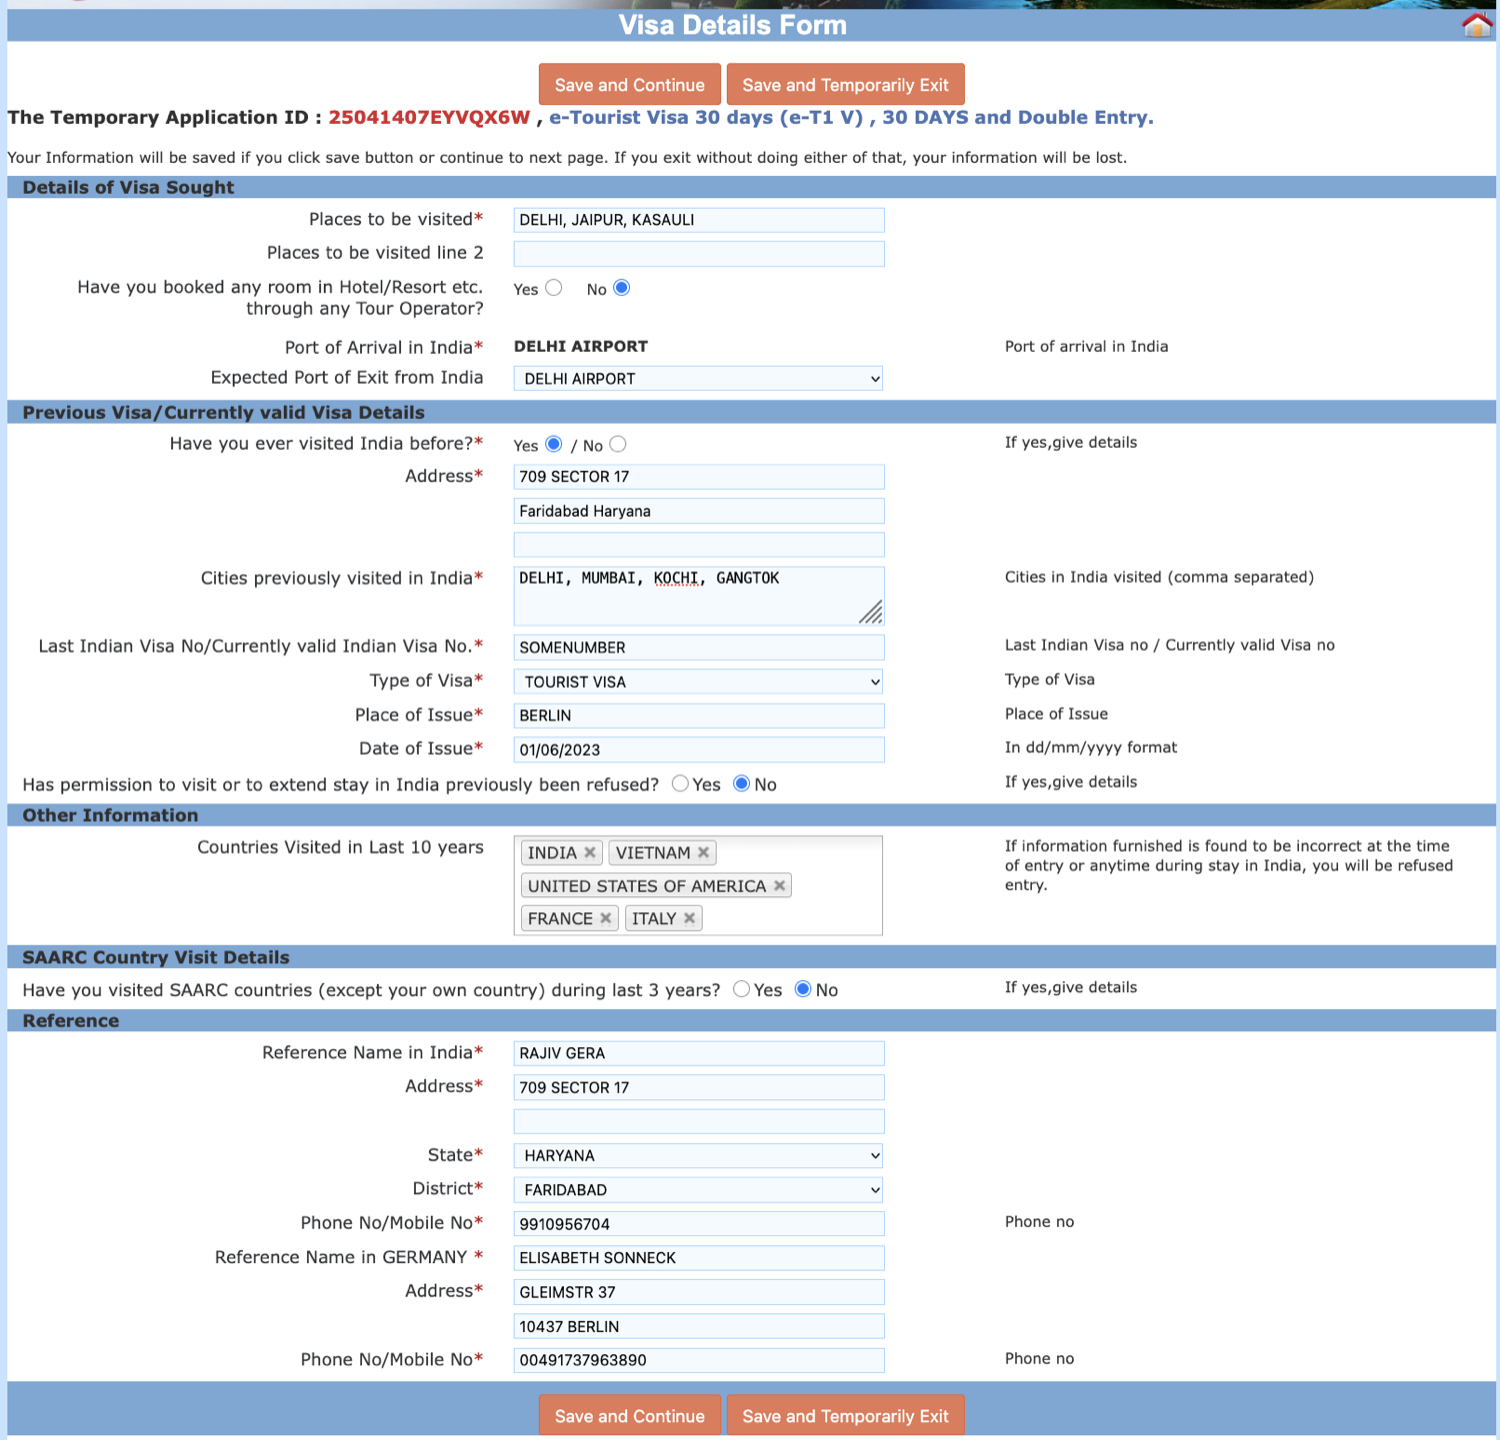
On the next page, enter the details as in the way in the screenshot below (note: for most, the question "Have you ever visited India before" is probably answered with No. But for some, they can use the below address, which is Kriti's dad). Here, for copy-pasting:
Places to be visited DELHI, JAIPUR, KASAULI
Reference Name in India RAJIV GERA
Address 709 SECTOR 17
State HARYANA
District FARIDABAD
Phone No/Mobile No: 9910956704
Click "Save and Continue"
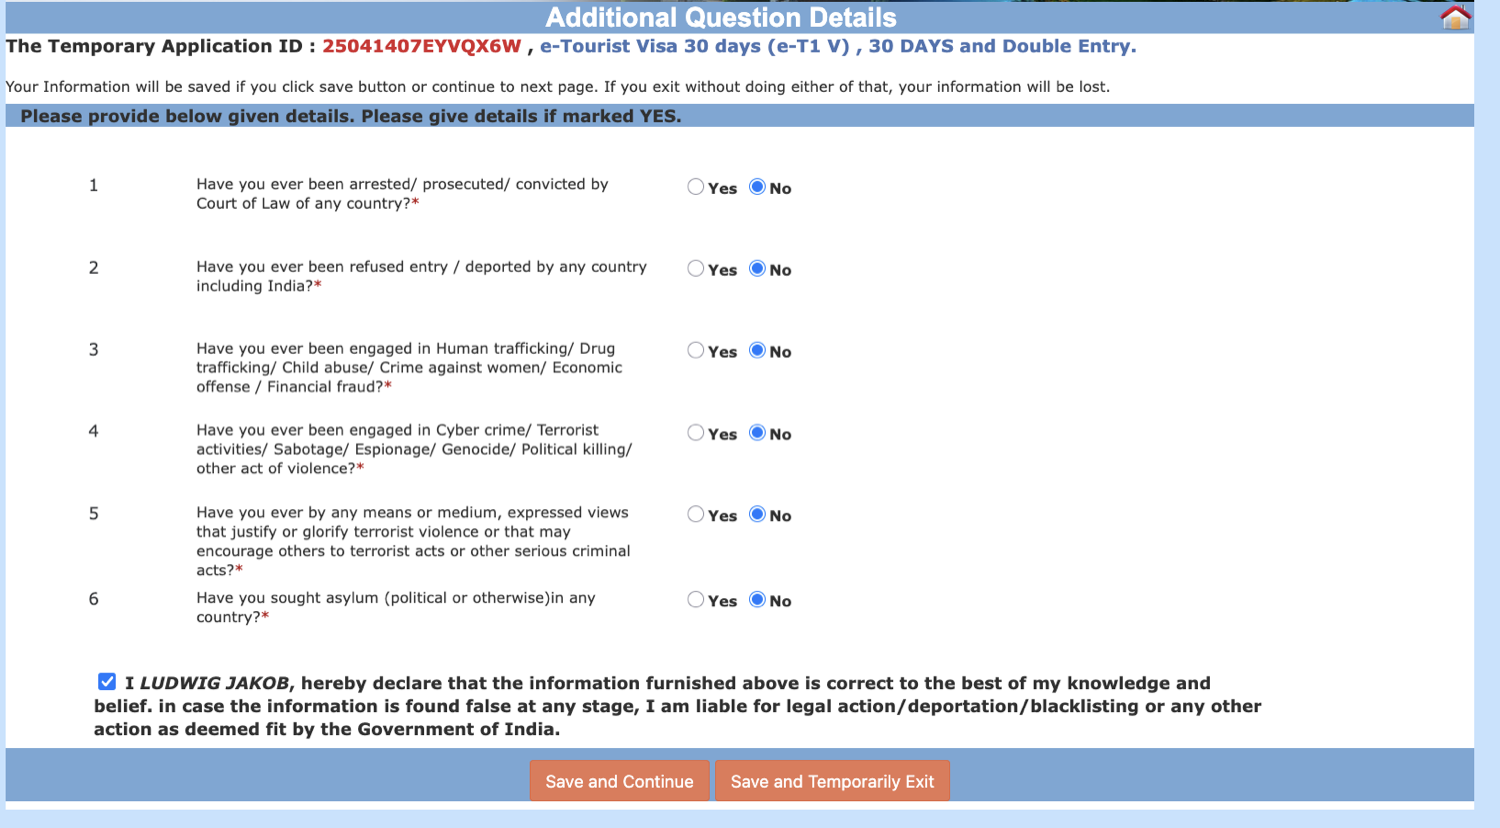
On the next page, tick the No checkboxes in this way:
Click "Save and Continue"
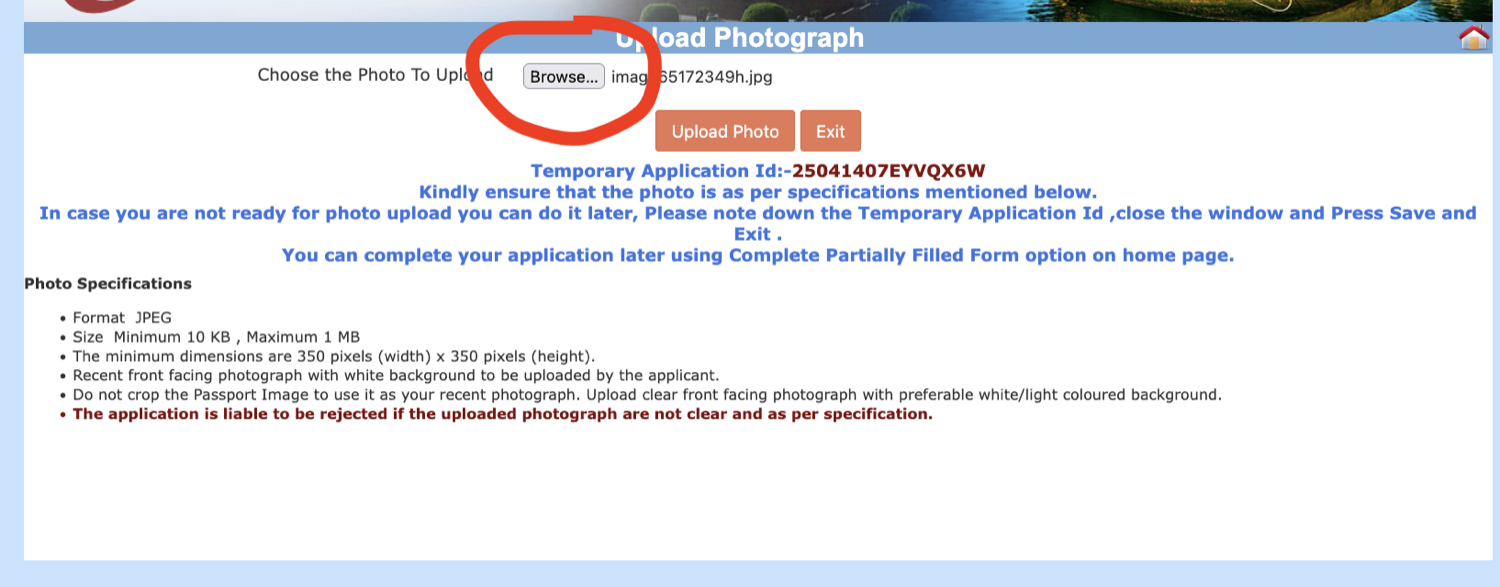
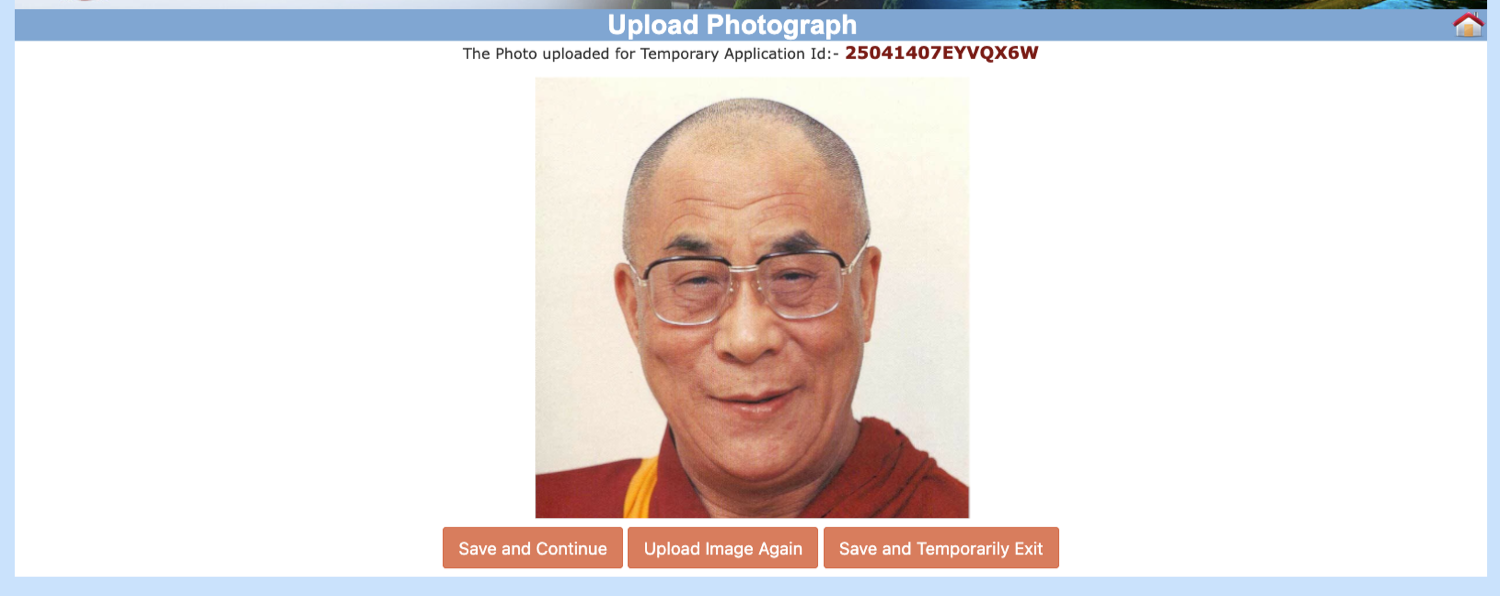
On the next page, click Browse, choose and upload a photo of you (jpg only, has some requirements on file size and format etc – see below), then place the crop.
You can take this picture on a white background with your own iPhone.
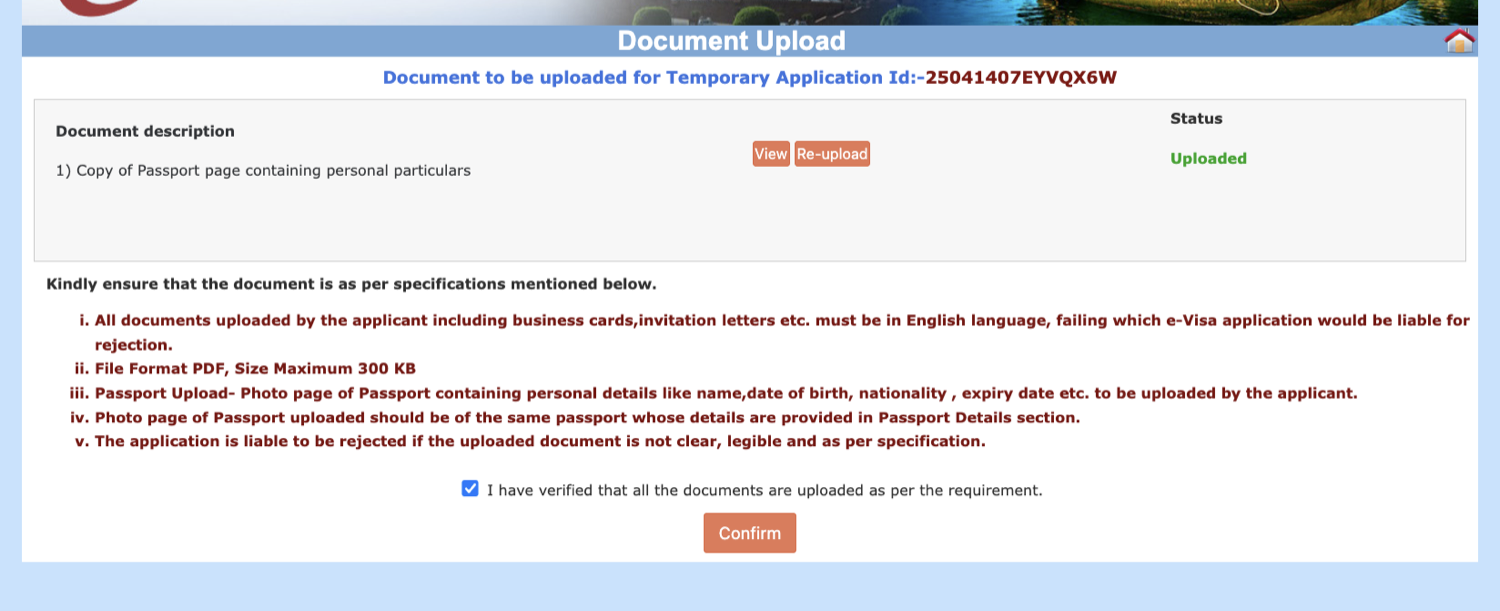
Upload a PDF of your passport. Caution: the file name must only have letters, no special characters like _ - ( ) ! or Leerzeichen etc. Ideally just call it passport.pdf.
If you don't have a scanner you can use the Camscanner app to take a picture of your passport's photo page with your iphone and convert it to a pdf.
On the next page, double check all the information you entered, and click "Verified and Continue"
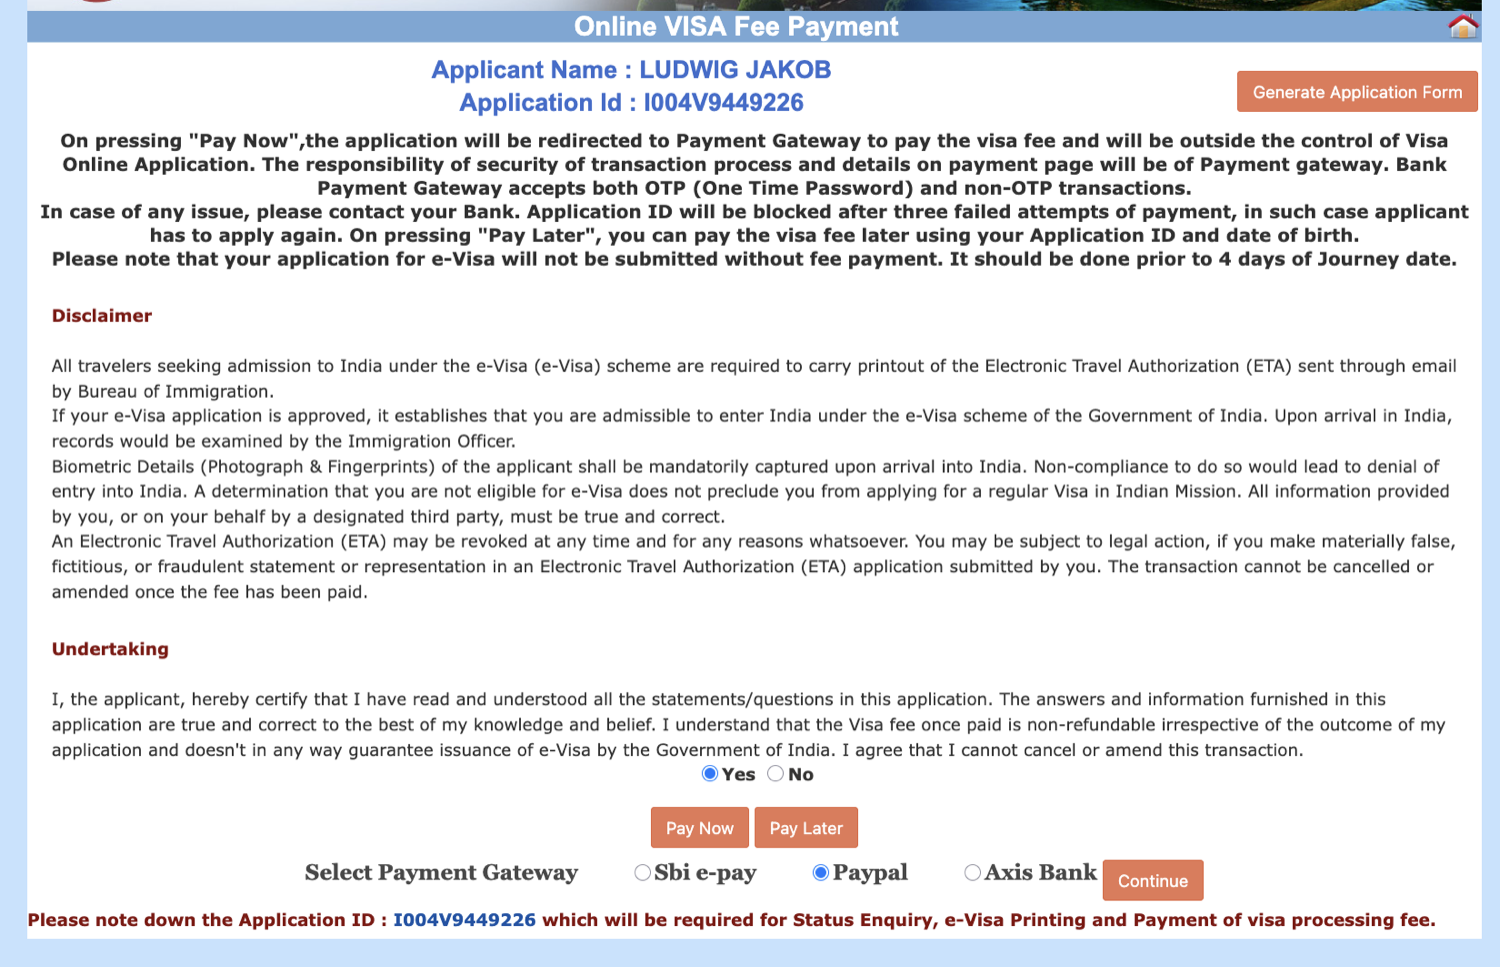
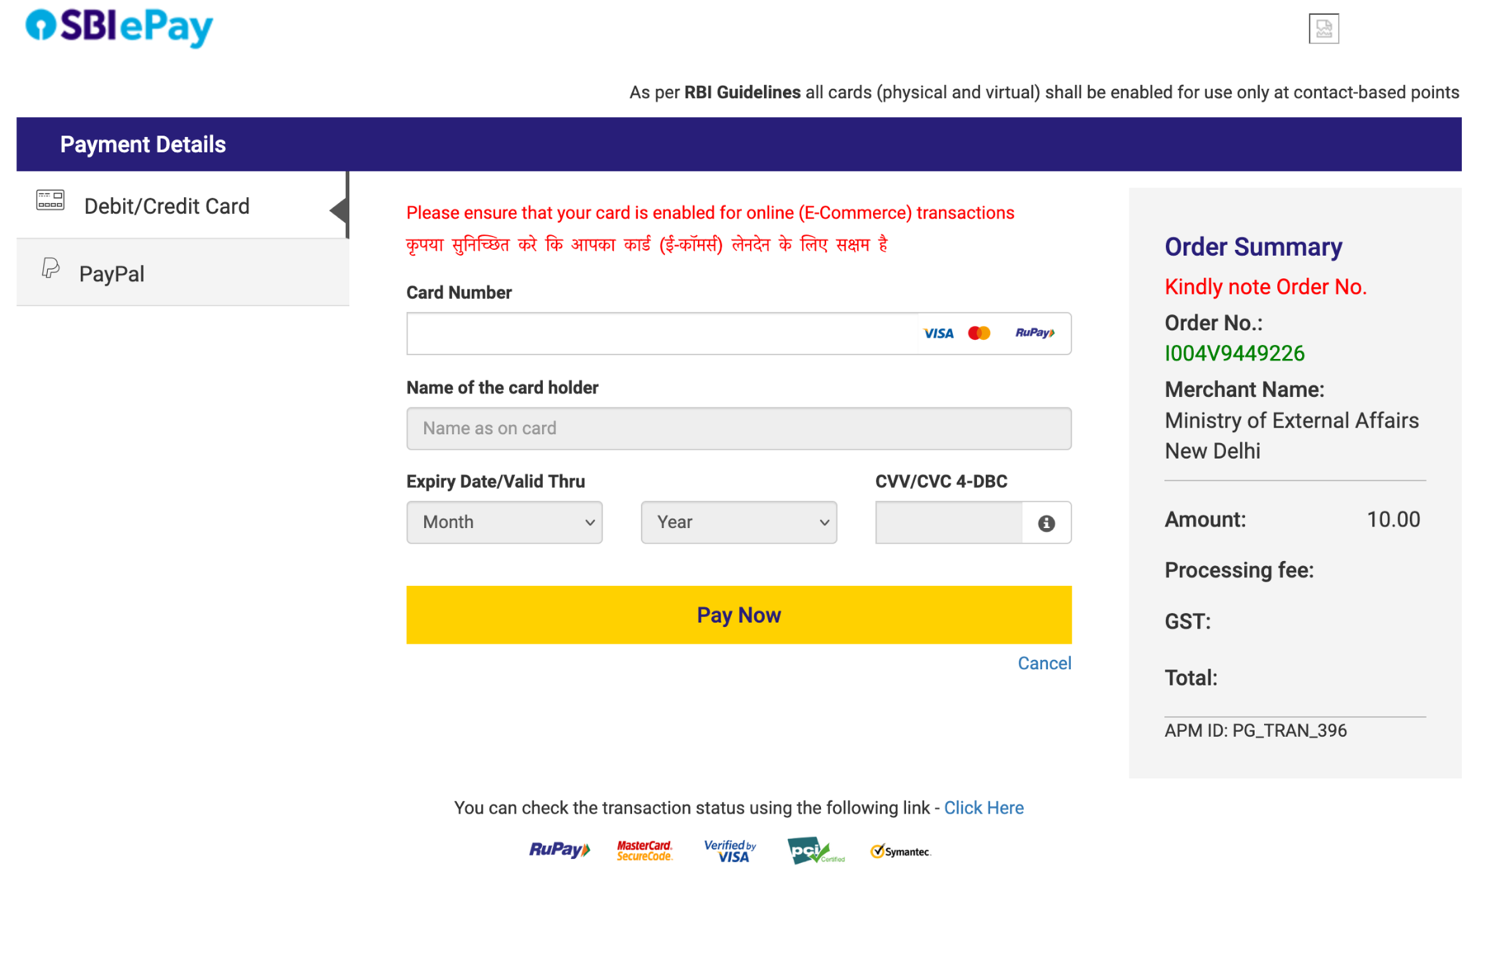
On the next page, tick Yes and click "Pay Now". Then select PayPal — this also allows you to pay with credit card, it just doesn't say so — and click "Continue". In the popup, click "Ok".
Now you can pay with PayPal or credit card.
Wait a few seconds, then you should land on the final screen with the confirmation of having successfully finished the process. Take a screenshot of your application / visa number and save it — you will need this later!
Once approved, you will receive the e-Visa by email. This can take 1–2 weeks. Not everyone gets an email — if you don't, go back to the link in the overview and click the second button from the right, "Check your visa status", to log in with your application ID and download your visa. Please print a copy and carry it with you when traveling and/or have a PDF copy on your phone.
One more thing
The visa is the big one, but it is not the last of it. There are two more forms closer to your flight: the e-Arrival Card, which only opens 72 hours before you land, and a short health declaration. Both are quick and free. See Travel info.